Getting Started
Intro
Set Driven Key - Shapekey Driver Builder Provide an Easy to Use Interface to Setup Drivers for Shapekeys
Demo - Bicep Muscle Corrective Shapekey
We will be using a Human Model Demonstration
The Clip Below is the Demo that we will be making
You can apply this addon and the technique for other use case, such as facial expression, muscle flexing and many other uses
Step 0: Prepare Your Rig
You will need a Mesh Object and a Armature and Bind the Mesh Object to the Armature

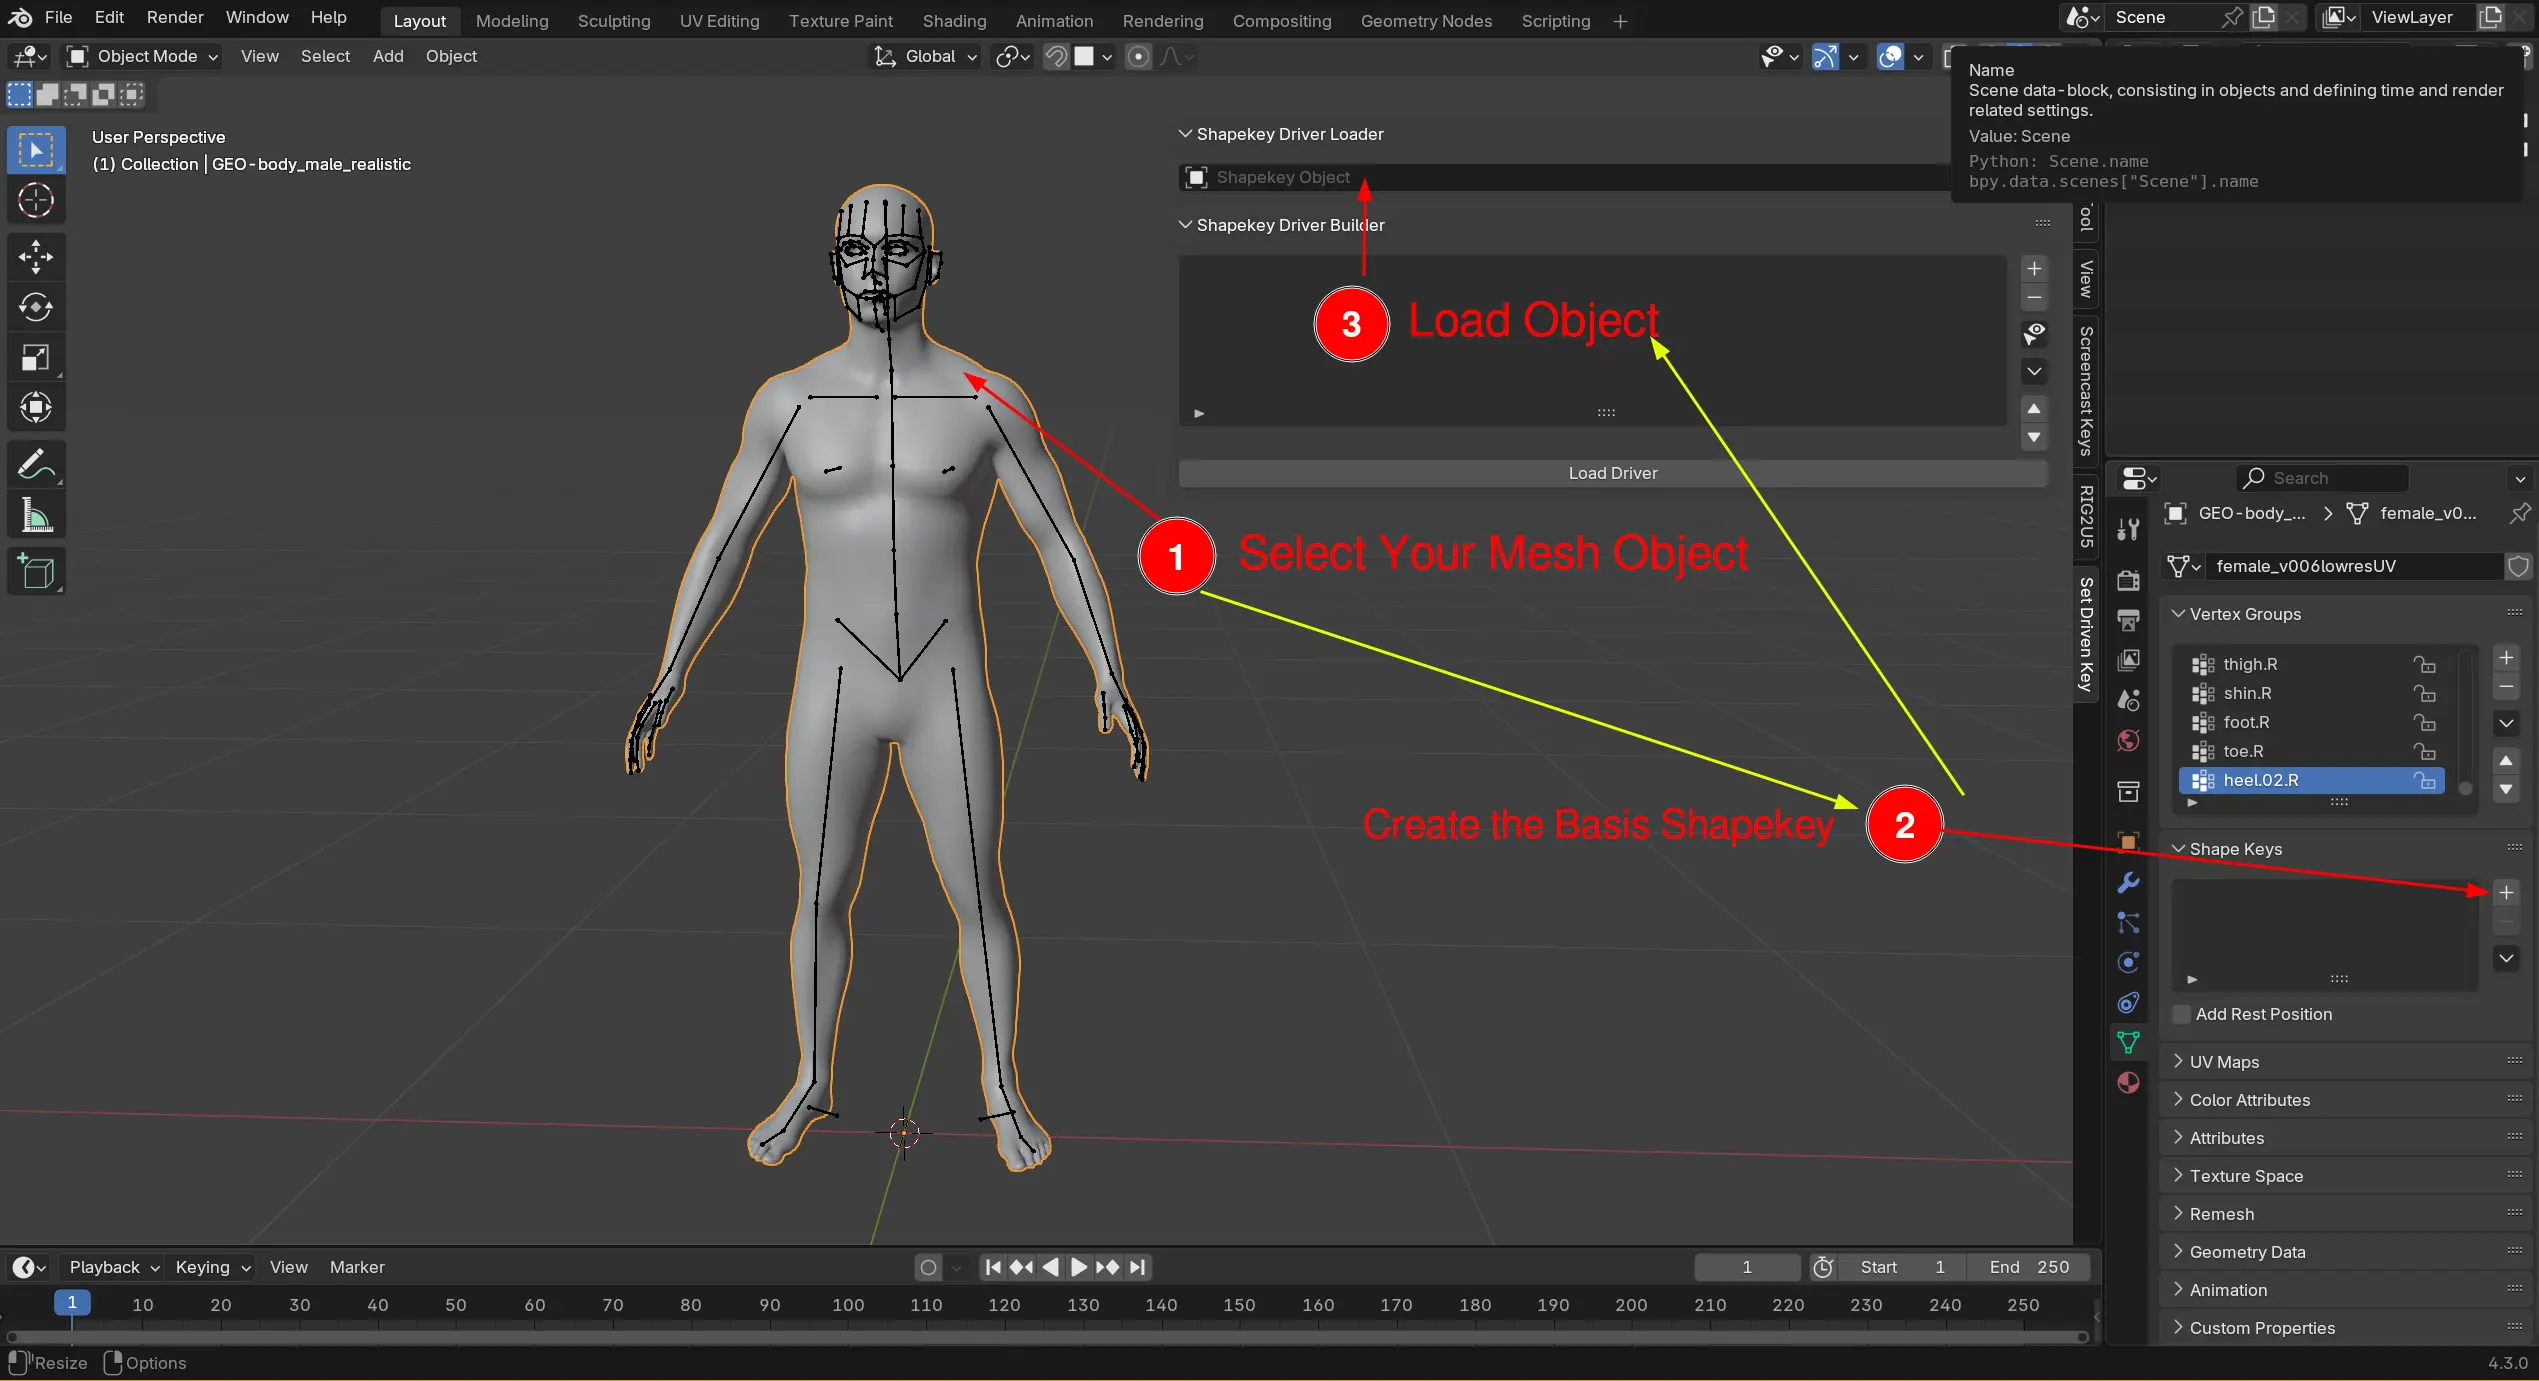
Step 1: Prepare Shapekey Loader
Prepare the Shapekey Loader by Adding a Basis Shapekey and Load your Mesh Object into Shapekey Loader
Step 2: Load Your Controller Bone and Pose Your Arm
First, You need to Select the Bone you want to use as Controller to your Shapekey
Click Load Driver

Step 3: Add New Shapekey & Load Shapekey
Add A New Shapekey

Set Shapekey Value to 1.0
Rename Your Shapekey and Load to Driver

Choose the Channel and Axis for Controlling the Shapekey

Step 4: Shape your Model Shapekey
You can now Shape your Model on this Pose either in Sculpt Mode or Edit Mode
You can Turn on “On Cage” and “Edit Mode” in Armature Modifier to see the Model Deformed by the Posed Armature

Step 5: Key Your Driver
Click Key Driver to Create a Keyframe In Your Driver

Step 6: Key Your Next Pose
You can Now Go to Your Next Pose / Rest Pose (Alt R) and Set Your Shapekey to 0.0 and Click Key Shapekey Driver to Create a Second Key

Step 7: Enable Driver
You can Now Enable Driver and See the Effect of the Corrective Shapekey